
When T and I shop for home furniture, I usually point to a rustic minimalist piece and ask, “Can you make this?” His answer is usually, if I had a “__”. The right tools usually get the job done. Lately, we’ve been attempting a few home projects where we start with an idea for something and then rummage around the hardware store for materials that may work. It’s amazing how much you can do with the right tools, a bit of creativity, and a basic knowledge of structural support.
Our TV stand was constructed in half a day in our apartment, no garage needed!


Tools:
jig saw
kreg jig
power drill
1 3/8″ spade bit
Supplies:
4 each 12″ long x 1″ diameter steel pipes
2 each 1″ elbows
2 each 6″ long x 1″ diameter steel pipes
2 each 1″ couplers
4 each 1″ flanges
a couple of thick pieces of wood (we used 1 3/4″ thick cedar boards)
screws
We chose black steel pipes over galvanized steel for its matte finish and decided to go with 1″ ID pipes and fittings for a more robust look, feel free to choose whichever size/style you’re going for.
Cut boards to desired length and width. The first step is determining the length you’d like for the TV stand. For us we have a 46” LCD so we made ours 60” long to provide room on either side for odds and ends. Once you’ve decided on a length, cut your boards to length with the jig saw. Alternatively the hardware store will usually cut them to length if you ask nicely. Using a good straight edge, the jig saw can then be used to “rip” your boards to width. Additionally you’ll need to cut two more pieces of wood. Those two pieces will separate the top and bottom sections of the TV stand and create a space for your cable box and DVD player. We left a slight gap on the sides (towards the back) to allow for ventilation.
Join wood pieces. The secret to the TV stand’s clean look is using a Kreg Jig to drill pocket screws. This allows you to join the wood pieces in a way that no fasteners can be seen. The Kreg Jig positions the drill bit just right so you don’t drill through the top of your workpiece. T used a screw every 12 inches along the length of the wood pieces. After the top and bottom pieces of the TV stand were assembled, he joined the top and bottom together with the additional sections of wood that were cut earlier.
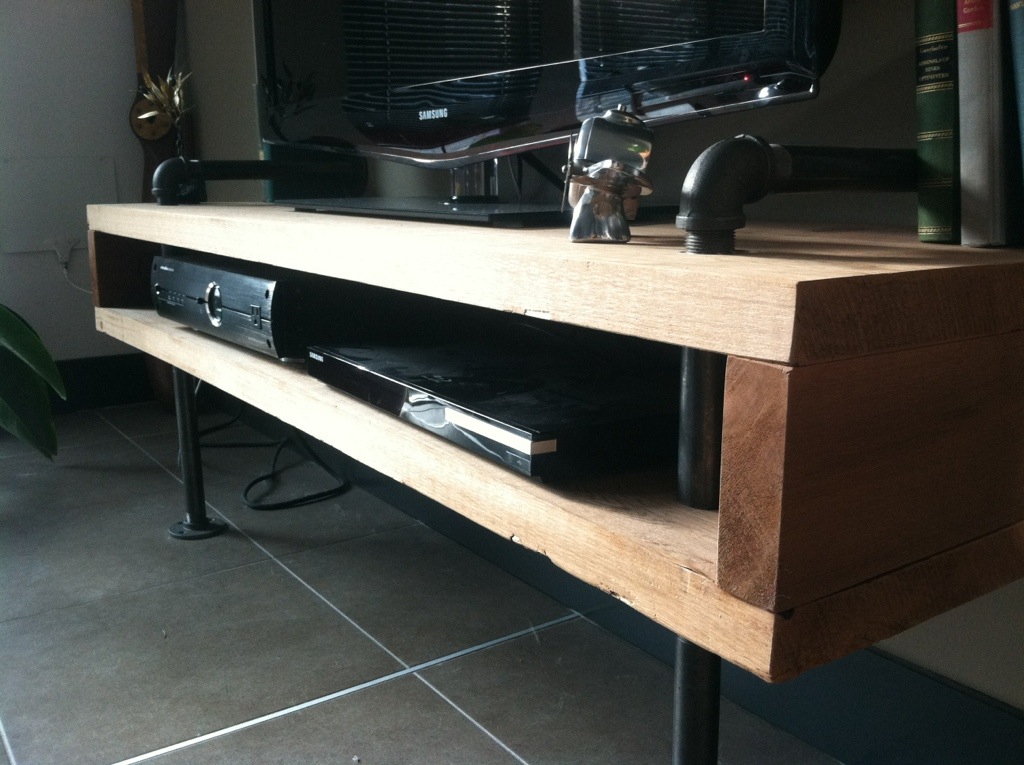
Assemble the stand. At this point you’ll have a wood box with an open front and back. From here you’ll need to drill holes in the top and bottom pieces of wood to allow for the steel pipes to pass through. Perform a dry run to make sure the holes are in the right location. T used a 1 3/8″ spade bit for the holes since we chose 1″ ID pipes. After the holes are drilled, assemble the steel pipes and install it into the wood “box”. One pipe assembly consists of the following (from bottom to top): flange (floor), 12″ pipe, coupler, 6″ pipe, elbow, 12″ pipe, flange (wall).
Install the ledger board. The ledger board is used provide extra support to the TV stand. T used a 1”x4” board for the ledger board. Attach the ledger board to the bottom of the top board of the TV stand. Once attached, position the TV stand where you’d like along a wall and screw the ledger board into the wall.

Looks great! ~M.
Thank you!
How much did this cost you in materials?
What are the dimensions of the side board and top and bottom boards? I plan to tackle this project.
Love it. i have a bit of an eclectic/mid century/rustic style and I think something like this wood look great. Do you recall roughly how much you spent constructing the tv stand?
It cost roughly $200 in materials.
Awesome, thank you!